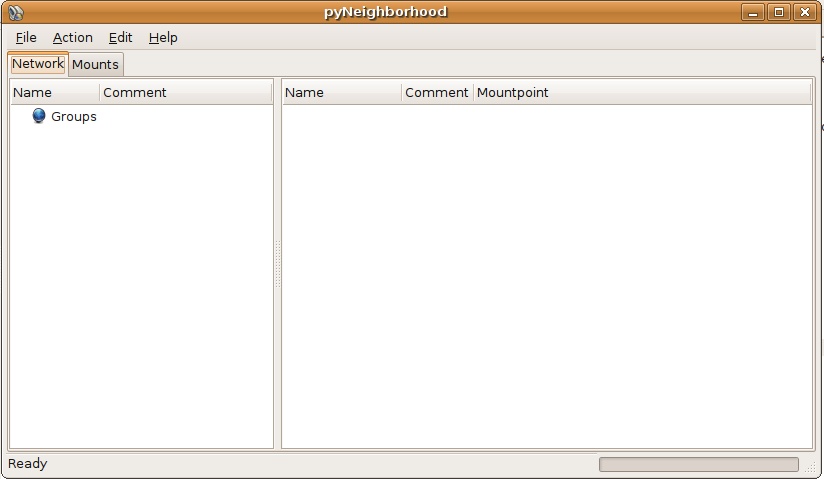
Need to connect to a Windows server from a computer running GNU/Linux? pyNeighborhood gives you an easy and graphical way to do just that.
Introduction
Over the last several years, I've been trying to persuade my wife to make the jump to GNU/Linux. While I've been making a little headway (mainly due to the problems my wife has encountered with Windows and Windows applications), one area in which she's stonewalled me is installing GNU/Linux on our home server -- which runs Windows XP. Whenever I broach the subject... well, let's say that the threats I hear scare me into not doing the deed.
Until recently, connecting to the server from my laptop running Ubuntu hasn't been a problem. I didn't have the need to do so. Lately, though, that situation has changed. And I've been transferring files via sneakernet -- copying them to a USB flash drive and walking over to the server. But I quickly learned that there's a better way.
If there's one good thing that I can say about Windows XP is that it supports the SMB protocol. This enables a computer running Windows to share files, folders, and more with another PC. All that other PC needs is the right software to take advantage of the SMB protocol. Luckily, that software is available for GNU/Linux.
The traditional way is to make the connection to the command line. A while back, a technically-inclined colleague of mine showed me how:
mount -t smbfs -o workgroup=(workgroup),username=(username),password=(password),ip=(ip_address( //(win_machine_name)/(share_name) /(mnt)
While I like the occasional technical challenge, that's a bit much especially when I'm hit with a bout of laziness. Instead, I went graphical with a piece of software called pyNeighborhood.
Downloading and installing the software
There are two ways to get pyNeighborhood: downloading it from the software's Web site, or installing it using a package manager like Synaptic. Obviously, the advantage of installing via a package manager is that it will also install the software that pyNeighborhood depends on. This software is:
- The Python scripting language
- PyGTK, which enables a graphical user interface for applications written in Python
- smbclient, which enables your computer to talk to another computer that supports the SMB protocol.
- smbfs, which enables your computer to access the file system on another computer
However, at the time that this article was written the version of pyNeighborhood in the Synaptic repository is 0.4.0; the version available at the application's Web site is 0.4.1. If (like me) you prefer to have the latest version of the software on your computer, then take the download route.
The version of the application at the pyNeighborhood web site is probably newer than the one available through your favourite package manager
Assuming that you've decided to download and install pyNeighborhood, remember to first install the software listed above first using a package manager. Why a package manager? It can be time consuming to find, compile, and install all of the required supporting applications and libraries.
First, extract the contents of the archive that you downloaded from the web site. This will create a directory named pyNeighborhood-0.4.1. Assuming that you extracted the archive to your /home directory, do the following: open a terminal window; in Ubuntu, select Accessories from the Applications menu, and then select Terminal. Then type cd pyNeighborhood-0.4.1.
Next, run the command ./configure, which checks to ensure that you have all of the required software installed. If there are no error messages, then type the command make, which compiles the application. Finally, type sudo make install. This command installs pyNeighborhood. You'll be prompted for the root password (or your password on Ubuntu systems).
Configuring pyNeighborhood
In Ubuntu, the shortcut for pyNeighborhood is added to the Applications menu, under Internet.
Before connecting to your friendly neighborhood Windows server, there are a few fiddly bits of configuration that you should take care of first. Select Preferences from the Edit menu. On the General tab, you can uncheck the option Remove mount points after unmount; more on this later.
In the Mount Folder field, type the name of your home directory -- for example, /home/scott. The mount folder is the location where pyNeighborhood creates the mount point (the location where you connect to another file system or device) to the shared folder on the Windows server. Normally, pyNeighborhood tries to use a folder like /media/network. You need root access in order to create the necessary mount points in that folder. The connection to the Windows server will generally fail. By specifying your home directory, you avoid the problem root access. pyNeighborhood adds a new folder to your home directory, which contains links to the shared folders on the Windows server.
Configuring pyNeighborhood is easy. Most of the work is already done for you
Click the File Managers tab, and then click the Add button. In the dialog box that appears, type the command to launch the file manager that you use (for example, nautilus in Ubuntu) and then click OK.
On the Windows server, make sure that at least one folder is shared. If it isn't, then you won't be able to access the server. See the Windows documentation for details on how to share a folder.
Making the right connections
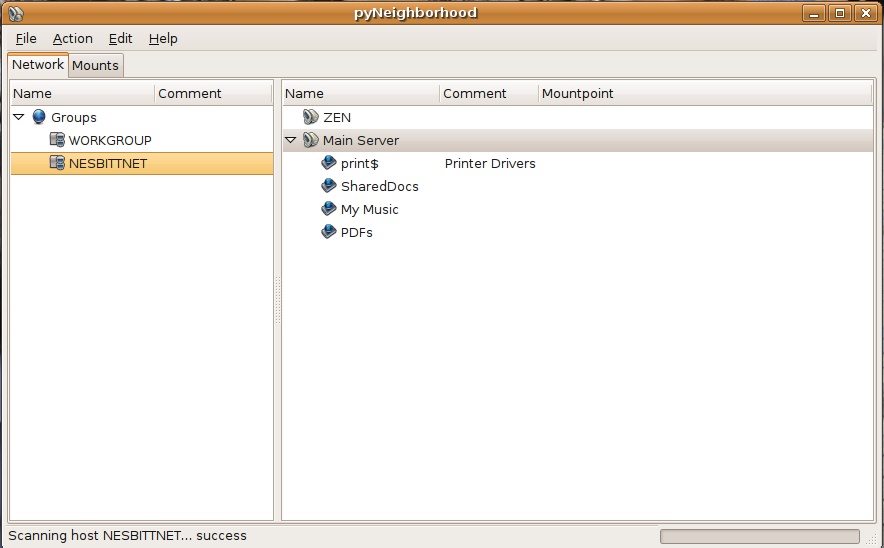
Now, you're ready to connect to a Windows server. Make sure that the server to which you want to connect is running. Then, select Add Machine from the Edit menu. On the Add Machine dialog box, type the name of the network in the Network name field. My home wireless network is called NesbittNet (not my idea!). Then, click the Try to retrieve missing data button. This should fill in the IP address of the server. Finally, if you want the network to appear with a different name -- like Home Server -- in the pyNeighborhood GUI, type that name in the Display in list as field and then click OK.

In the right portion of the pyNeighborhood window, double click on the name of the server that you just added. It expands to show all of the shared folders on the server.
Double clicking on the name of a folder adds a shortcut to it on your desktop. Double click the shortcut to open the folder in Nautilus (or whatever your file manager is). As far as GNU/Linux is concerned, those shortcuts are just like any other mount point on your system. If you unchecked the Remove mount points after unmount option when configuring pyNeighborhood, the shortcuts will remain on your desktop even after you shut down pyNeighborhood.
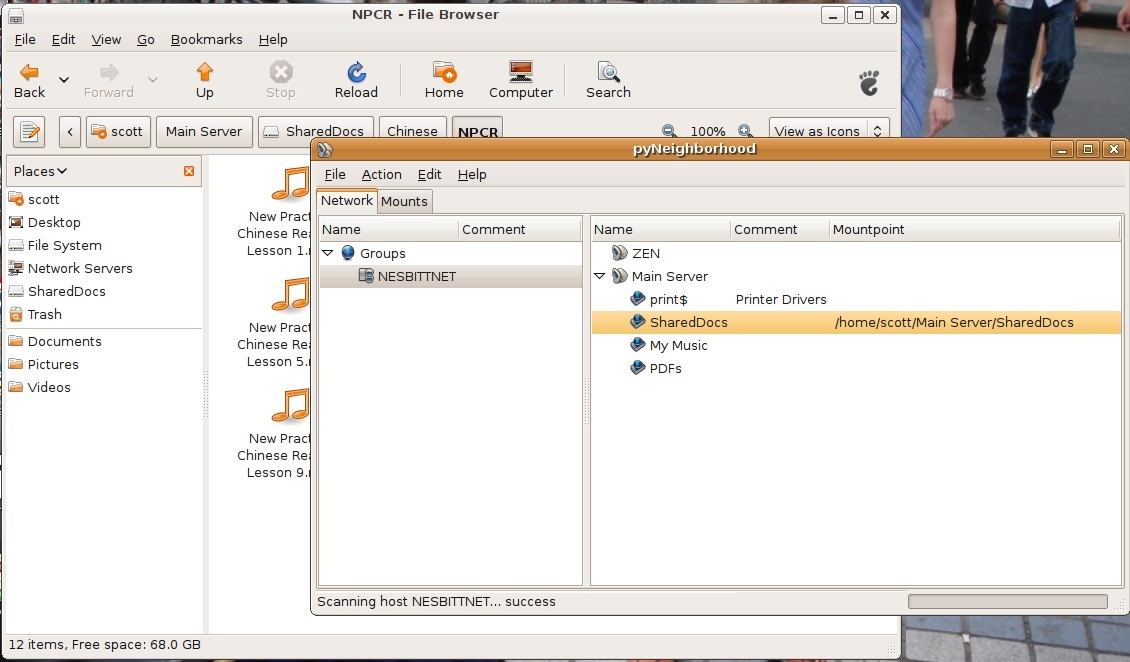
You can also do the same thing by right clicking on the name of a shared folder in pyNeighborhood and selecting Mount, and then right clicking again and selecting File Manager.
Working with the connection
So, what can you do with this connection? It depends on the permissions that were set up on the Windows server. In my network, for example, I have full read and write access to the shared folders on the server. I can copy, move, and delete files and folders at will. I can also play media files like movies and music right off of the server, with no noticeable lag. I've also been able to copy edit a few of my wife's essays, and collaborate on a project or two with her without having to resort sending files via email or using sneakernet. Just worked with the files right off the server.
Transferring files between GNU/Linux and the Windows server is easy, although not always fast
I've found, though, that copying files from my GNU/Linux laptop to the Windows server can be a bit slow. I discovered this after ripping the CDs that accompany my wife's Chinese language textbooks. It took more than an hour to transfer just over 800 MB of files over. And that was when I was the only person using the network. That said, I've copied large files from the server to my laptop and they've taken no time at all to come over.
The only thing I wasn't able to do is print via the printer that was attached to the server. But since we upgraded to a wireless printer recently, that hasn't been a problem -- I can access the printer directly.
Conclusion
While GNU/Linux is coming into wider and wider use, we still have to play nicely (or, as nicely as possible) with the Windows world. That includes working with a Windows server. pyNeighborhood eases much of the pain that's involved in connecting to a Windows server. It's easy to use, and makes the experience of working with a Windows server seamless.