For me there is nothing quite as relaxing as the sounds of the beach. The slow crashing of waves and the gentle lapping of water in the tide pools really helps me find my inner calm. Of course, I could do without the smell of rotting fish carcasses, the constantly screeching gulls and the looming threat of melanoma. So I decided to create my own virtual beach experience using some free sound clips from the internet and the free software package called Audacity. I’ve got all the relaxation without the annoying dead fish, dive bombing birds and sunburn.
Introduction
Using environmental sounds for relaxation is nothing new. The white noise and repetition of waves or waterfalls or even a gentle rain can help a person tune out the noisy, modern world and find calm. I know it helps me relax. The big question is, do I want to buy prepackaged nature sounds or try my hand at creating my own. Plenty of retail outlets would be happy to take my money in exchange for nature sounds on CD or a fancy new environmental sound machine. There are some pretty convincing recordings out there and I must admit it was tempting to hand over a little hard earned cash for some instant gratification. Of course, if I had chosen that route this would be a very short article. In the end, I decided to use Audacity, one of my favorite free software applications, to create my own virtual trip to the beach.
Follow along in this article as I cover each step as it relates to creating a virtual trip to the shore
The process of creating environmental sound clips, or any sound clips for that matter, with Audacity is not terribly difficult. There are only a few basic steps.
- Install Audacity
- Find the sounds you want
- Bring the sounds into Audacity
- Mix the sounds together in an interesting way
- Prepare a final audio file in a common format
Follow along in this article as I cover each step as it relates to creating a virtual trip to the shore. In the end you will hopefully find your inner calm. If nothing else, you will learn quite a bit about how Audacity works and how you can use it to make all sorts of audio projects.
Downloading and installing Audacity
The first thing I need to do is install Audacity on my computer. I’m a GNU/Linux user so I was able to find a packaged version of Audacity on my distribution CD-ROMs. If you are a penguin fan too, you’ll probably find Audacity on your distro’s install media. If you’re planning to work through this project on a Mac or a Windows machine you’ll want to visit the Audacity project web page. This is where you can find the latest downloads and installation instructions for your operating system.
Finding the essence of the ocean
The next step in my project is to find the ocean sounds that I want. Audacity has the capability to record sounds directly from a microphone onto the computer’s hard drive. This would be the best way to get authentic ocean sounds. But, unfortunately, I live hundreds of miles from the nearest ocean. So I did what any computer geek would do and downloaded some cool ocean sounds from the internet.
A quick web search for the terms “free”, “ocean”, and “sounds” came up with some good hits. I found a couple clips from a site called Shockwave-Sound.com that really fit my idea of what a relaxing day at the beach sound sound like. Specifically, I found a clip called “oceano 2 sound” that captures a big wave crash and another clip called “Ocean lap (ocean surf)” that reminds me of water slapping against the hull of a boat. Both of these sound clips are recorded in the WAV file format and are easy to import into Audacity.
Capturing nature in a computer
Once I have my sound clips from the internet, I need to get them into Audacity. Opening WAV files in a sound editor is just like opening documents in a word processor. I simply start up Audacity and choose Open... from the File menu. I then navigate to the location of the oceano2.wav file and click OK. Once the file is loaded, I can click on the big, green play button to hear the sound of a wave crashing onto the shore.
Opening WAV files in a sound editor is just like opening documents in a word processor
I also downloaded a clip of lapping water that I want to use in my project. However, I need to load this file a little differently. This time I need to choose Import Audio from the Project menu, navigate to the oceanlap (Ocean Surf).wav file and click OK. This way I get both clips in the same Audacity project instead of opening them in two separate windows.
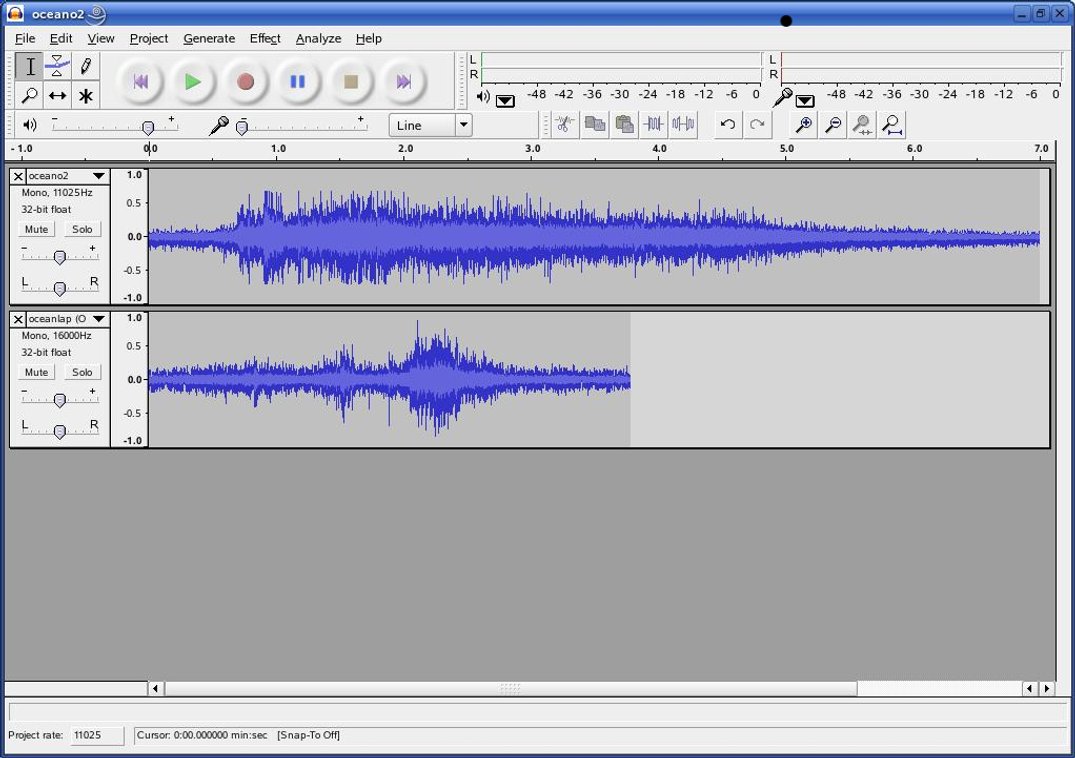
Now when I click on the play button I hear both sounds at once. If I want to hear the new, lapping ocean sound all alone, I can click on the Solo button just to the left of the waveform display. This area is called the track control panel and contains some of the information and controls that I’ll use for this project. For now I’m only interested in the Solo button. I’m satisfied that the lapping water clip sounds good by itself so I’ll click the Solo button once again to deselect it.
The ocean (remix)
Now that I’ve gotten a couple of interesting sound clips into Audacity’s buffers, I can start the process of editing and mixing them. This is where the cool stuff happens. Once you’ve gone through these steps, feel free to revisit this section and add your own personal touch to the editing and mixing.
Naming tracks
Before I get started editing, I want to make my life a little easier and give some meaningful names to the tracks I’ll be working on. I can do this clicking the downward pointing arrow on track control panel and selecting Name... from the pop-down menu. Since the first track I loaded sounds like a crashing wave, I’m going to name it just that. I will name the second track “lapping water”. You can choose any designations you like, but “crashing wave” and “lapping water” are the names I will use when referring to the tracks in this article.
Copying and pasting
Now that I’ve devised a way to keep the two tracks straight, I need to decide what kind of editing I want to do. One of the first things that jumps out at me is that the two clips are drastically different in length. The crashing wave lasts about twice the amount of time as lapping water track. I can take care of this by copying and pasting the lapping water track so that it repeats itself. I select the entire length of lapping water by clicking on the blank area of the track control panel. It really doesn’t matter where I click as long as it’s not on one of the buttons. When the track’s waveform is highlighted, I can use the Edit menu to Copy the selection. Once this is done I am ready to paste a second copy of the track at the end. To find the end of the track I’ll use the Edit menu again and select Move Cursor...→to Track End. After that, a third trip to the Edit menu reveals the Paste option and I have effectively doubled the length of lapping water. A quick tap of Home on the keyboard and a click on the big green play button will let me listen to my editing job.
When the track’s waveform is highlighted, I can use the _Edit_ menu to _Copy_ the selection
Adjusting volume
In the end I want to create a virtual ocean experience that lasts longer than the seven seconds of sound I currently have. One way I can do this is to use the same trick I used to extend lapping water and just repeat the whole project over and over again. To see how this would sound, I hold down the Shift key right before I click the play button. This puts Audacity into loop-play mode and the tracks will repeat until I click stop. This seven second loop would be pretty annoying in a music track, but for an environmental sound track repetition can be relaxing.
My repetitious virtual ocean is sounding pretty good, but there are a few things to tweak. For one, the crashing wave track ends slightly before the newly extended lapping water track. This incongruity creates about a tenth of a second jolt where the sound level drops, but it can be easily solved. Looking at the waveform display, I can see that the bulk of the sound in the crashing wave track happens between 0.5 seconds and 5.5 seconds. The rest is just background noise and can be faded. I can use my mouse to highlight the section of crashing wave between 0 and 0.5 seconds. Then I select Fade In from the Effect menu. I can use a similar procedure on the last 1.5 seconds of the track, except this time I’ll choose Fade Out.
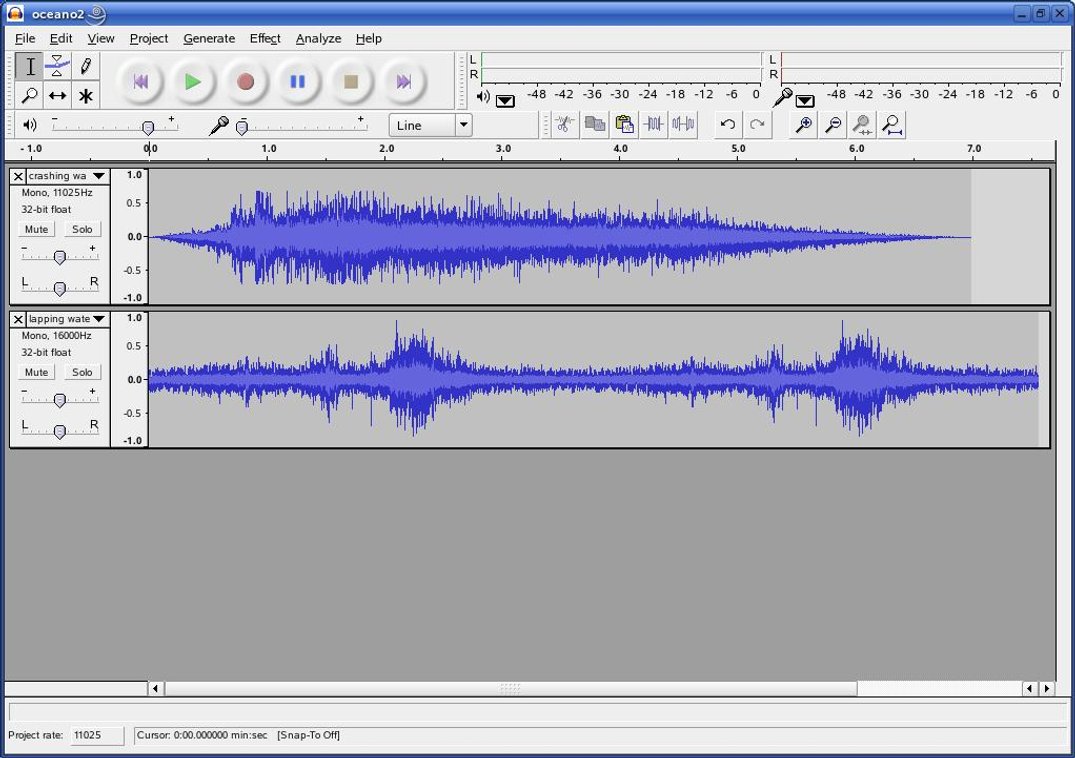
The jolting drop in sound is gone and the next thing I want to fix is the relative loudness of the two tracks. I think of crashing waves as very powerful sounds, but right now my crashing wave is about the same volume as the lapping water. I can easily lower the volume of the lapping water track by using the gain control on the track control panel. If I slide it to the left three notches I get a 9 dB drop in gain which results in lapping water being less obtrusive and crashing wave sounding more powerful.
Creating the illusion of stereo
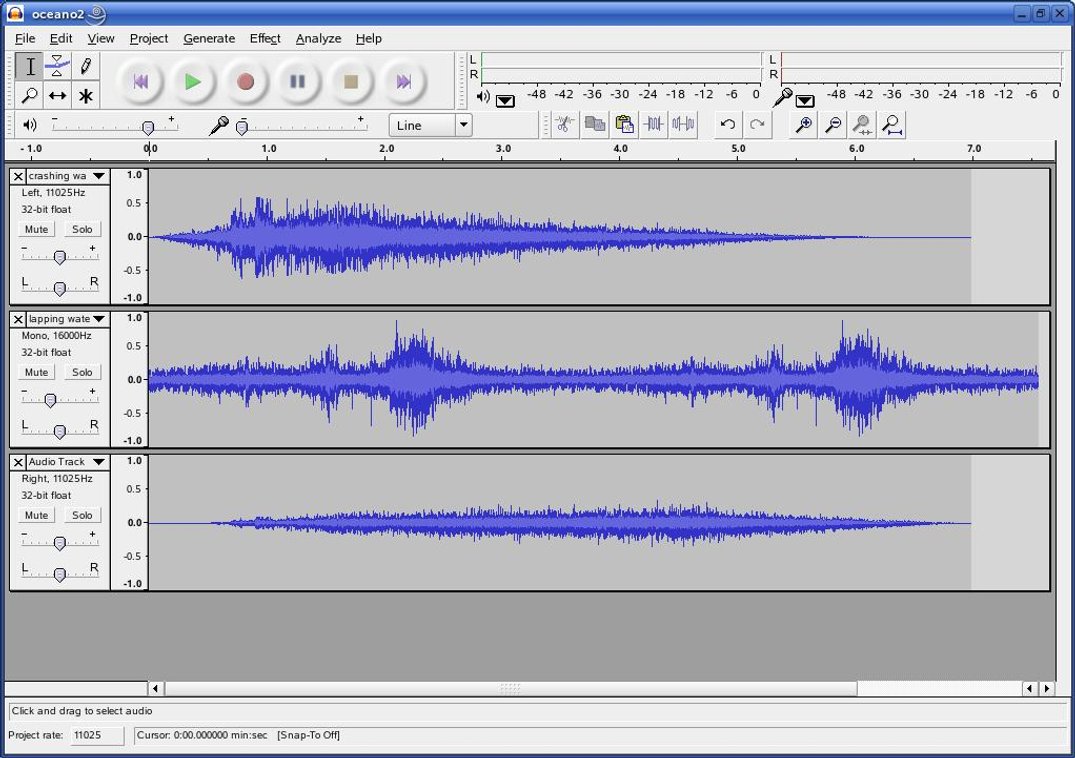
My virtual ocean is coming along nicely, but somehow it still sounds a little flat. I can add some depth to the sound by making it playback in stereo. Since I am working with monaural clips, I have to employ a little bit of creative trickery to make it sound like a true stereo recording. I’ll create the illusion of stereo by having the wave sound move from the left to right as it crashes onto the shore. It may sound like a complex task, but I can do it all using techniques I’ve already employed.
I’ll create the illusion of stereo by having the wave sound move from the left to right as it crashes onto the shore
I first create a new track by choosing New Audio Track from the Project menu. Then I copy the entire waveform from the crashing wave track into the new track. I use the same technique of selecting and copying as I did with the lapping water track, except this time I’ll paste the contents of the clipboard into the new track. Now that I have two tracks, I can use the track pop-down menus to assign one of them to the left channel and the other to the right channel. The entire left channel track can then be faded out while the entire right channel track is faded in, giving the appearance of the crashing wave moving left to right. It sounds pretty convincing when I listen in loop-play mode.
The final cut
I really don’t want to boot up my PC every time I decide to listen to my virtual ocean, so the final step in my project is to export the audio to a file format that is compatible with my digital audio player. My player can play stereo tracks in WAV, MP3 or Ogg Vorbis.
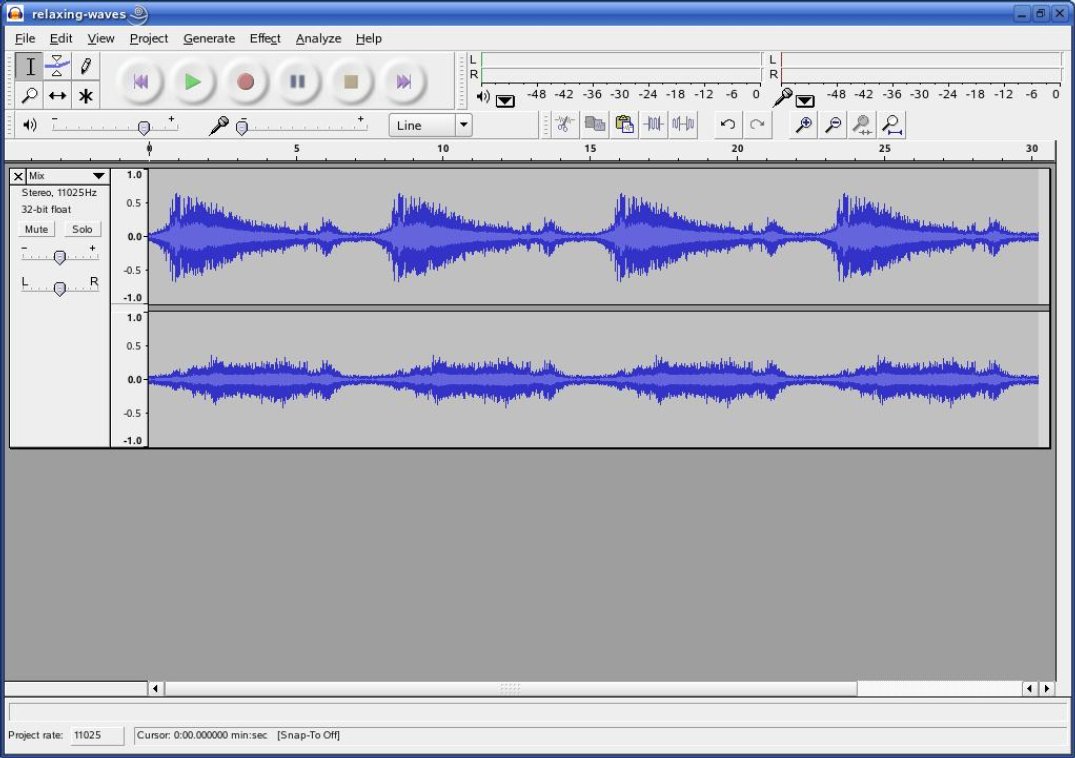
First, I need to take the three tracks in my Audacity project and mix them down to one left channel and one right channel for my audio player. I’ll do this by first choosing Select...→All from the Edit menu and then choosing Quick Mix from the Project menu. Next, I can do some repetitive copying and pasting to make the ocean sounds extend beyond a mere seven seconds. Finally, I’ll choose one of the Export As... options from the File menu. Now all I have to do now is transfer the file to my audio player and I can enjoy a relaxing trip to the virtual beach.
Where do we go from here?
In this article I’ve just scratched the surface of what Audacity can do. If you like what you’ve seen so far, there’s no better way to learn than to get some more hands-on practice. You don’t have to limit yourself to making environmental tracks either. Maybe you’re itching to try your hand at mixing music or recording live events. Whatever it is, if it’s related to audio, you can probably do it with Audacity.