SSH tools, long used by UNIX gurus to perform complicated administrative tasks over the internet on machines miles away, are a very simple and user-friendly solution for more conventional purposes. Ubuntu users, read on to learn how to use SSH to run your favorite GNU/Linux software on Microsoft Windows—without installing any software on the Windows box.
Installing an SSH server
Before you begin, make sure you have the necessary materials. You need an Ubuntu machine to serve programs and a Windows machine to access them, a USB stick if you want to make your setup portable, and a fast network connection if you want to be able to run anything more complicated than nano.
You are going to be focusing your attention on accessing programs from a Windows machine, but first you need to install some server software on your Ubuntu box. You will be installing OpenSSH, the de facto standard in the free software world for opening a secure gateway to your PC. The OpenSSH server installs just like any other software and requires no additional configuration for our purposes. The whole process should take about two minutes.
The OpenSSH server installs just like any other software and requires no additional configuration—the whole process should take about two minutes
These instructions are tailored for Ubuntu users, but OpenSSH is available for nearly every GNU/Linux distribution and other UNIX-like operating systems. Windows users can install SSH servers, too. Although it is only a bit more complicated on Microsoft’s platform, you will have to refer to the OpenSSH for Windows project for guidance.
If you are comfortable installing software on your Ubuntu machine, go ahead and install the openssh-server package. If this is unfamiliar territory, all you need to do is enter the command below in a terminal. You can use the Terminal program found in the ApplicationsAccessories menu.
sudo apt-get install openssh-server
You will be prompted to enter your user password and respond “yes” to installing the package and any associated dependencies. Installing the OpenSSH server is as simple as that and it should be configured correctly right out of the box. If you run into problems later, skip to the end of the article for configuration troubleshooting.
You can also install software using Synaptic Package Manager (System→Administration→Synaptic Package Manager), without touching the command line.
Stay by your Ubuntu box for one more minute. To access it later on, you will need to know the machine’s location on the internet (IP address). If you don’t know it already, visit a website that will tell you your IP address. Depending upon your internet service provider’s practices, this address could change periodically. You can create a stable DNS name for yourself using a dynamic DNS service.
If your Ubuntu machine is one of several computers in a local area network (LAN), things become a bit more complicated. To access the Ubuntu machine from another computer within the LAN, you will have to find out what address your Ubuntu box has been assigned. If you are using a home network router, this should be easy to do from a web browser—consult your router’s manual for details. Alternatively, you can use the [ifconfig](http://linux.die.net/man/8/ifconfig) command or ask your system administrator.
If you are accessing your LAN from elsewhere on the internet, you will need to make sure your router is forwarding the SSH port (port 22, by default) to the Ubuntu machine. This can also be setup from your router’s web interface without much hassle.
Windows client-side software
You are going to need some software Microsoft didn’t supply for you to access your server on Windows, but I wasn’t lying—you don’t have to install any of it if you don’t want to. You will need an SSH client to connect to your Ubuntu box and an X-server to display graphical applications. You can use free software tools from Xming, which can be carried around on a portable USB stick (or any other portable device with about 8MB of free space) usable on any computer running Windows. If you don’t want to bother with the USB stick, just install everything to the computer as normal.
If you are using Windows XP or newer, download the Xming installer and double click to begin. Note that there is also an older version of Xming for Windows 2000, but platforms prior to that are not supported. Click “Next” on the welcome screen to be prompted for the installation location. If you want to put it on your USB stick, click “Browse” and select the proper drive.
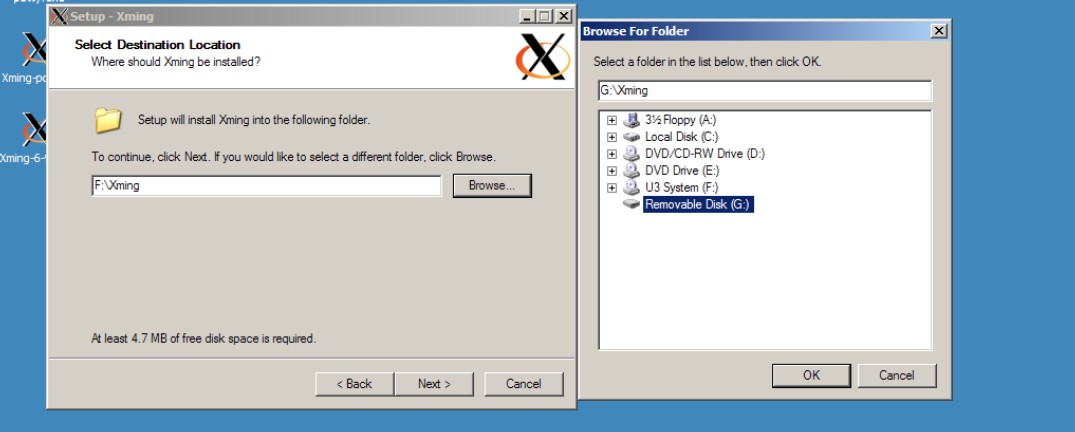
Click “Next” again to be presented with a few installation options. You can do away with “Non US Keyboard support” to save a little space, but leave the rest of the packages checked. Click “Next” again and you will be asked if you want to create a start menu folder for Xming. If you are installing to a USB stick, you can check off “Don’t create a Start Menu folder”. On the next screen, you will want to uncheck all of these options as well. Click “Next” one last time and then “Install” to finish up.
Running remote applications
To test out Xming, plug your USB stick into a Windows computer, open the Windows Explorer file manager and navigate to the USB stick. Open the folder you installed Xming to and double-click on the XLaunch application.
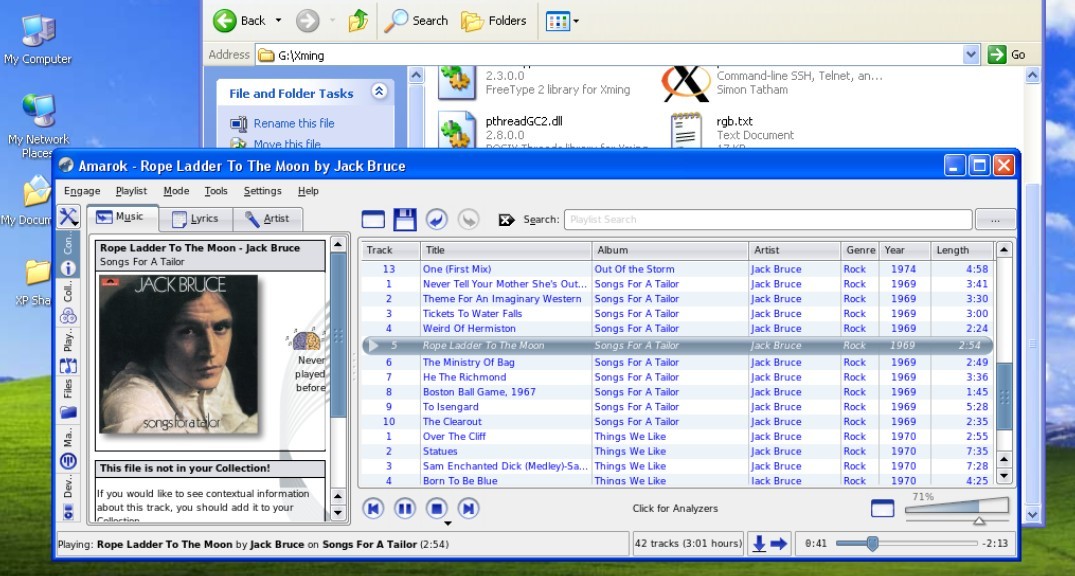
You can use your Xming USB stick with any Windows machine running XP or later
You will be greeted with a handy wizard to help you access your Ubuntu machine. On the first screen, keep the “Multiple windows” option checked so that the program you launch is opened in a window like any other application would be. On the next screen, choose to “Start a program” so that you can immediately test your server without having to drop down to the command line.
Click “Next” and then fill out the server and program’s parameters. First, enter the name of the program you want to run in the text box next to the words “Start program”. It is important that you know the Unix name of the desired program, which is the command you would type on your Ubuntu machine to run it rather than the exact name of the application. This is usually just the application’s name in all lower-case letters. For instance, to run the GIMP, type gimp. Some software does deviate from this rule, such as Firefox: mozilla-firefox.
Still on the same screen, select the “Using PuTTY (plink.exe)” option in the “Run Remote” frame. PuTTY isn’t installed on this USB stick, but Xming came with a replacement program that does everything you need it to. I will discuss this program in more detail shortly.
In the “Connect to computer” textbox, input the IP address of your Ubuntu box that you noted earlier. In the “Login as user” textbox, input your Ubuntu user name. Of course, in the “Password” box you need to input your Ubuntu password. Click “Next” twice and then “Finish” to start the application.
Once you have your application running, you can use it just as you would sitting in front of your Ubuntu box. Keep in mind, however, that you are still using all the hardware from your Ubuntu machine rather than the Windows one—SSH is just giving you a window into it. That means that files you want to save or open have to come from the Ubuntu machine’s hard disk or removable storage drives. The same goes for sound and printer output.
Once you have your application running, you can use it just as you would sitting in front of your Ubuntu box, but keep in mind that you are still using all the hardware from your Ubuntu machine
This also means that applications will run just as fast as they do on your Ubuntu box, even if your Windows machine is sluggish, provided that you have a fast network connection. One thing that should transfer between computers automatically is the contents of the clipboard when you copy and paste things, although this does not work perfectly. To learn how to easily share files between your two computers using SSH, refer to the SSH Beyond the Command Line article in Free Software Magazine issue 19.
Xming and the command line
Now that you have Xming up and running and are enjoying graphical applications, try using it to open a terminal from your Ubuntu box. This will allow you to use command line utilities and even open other graphical applications.
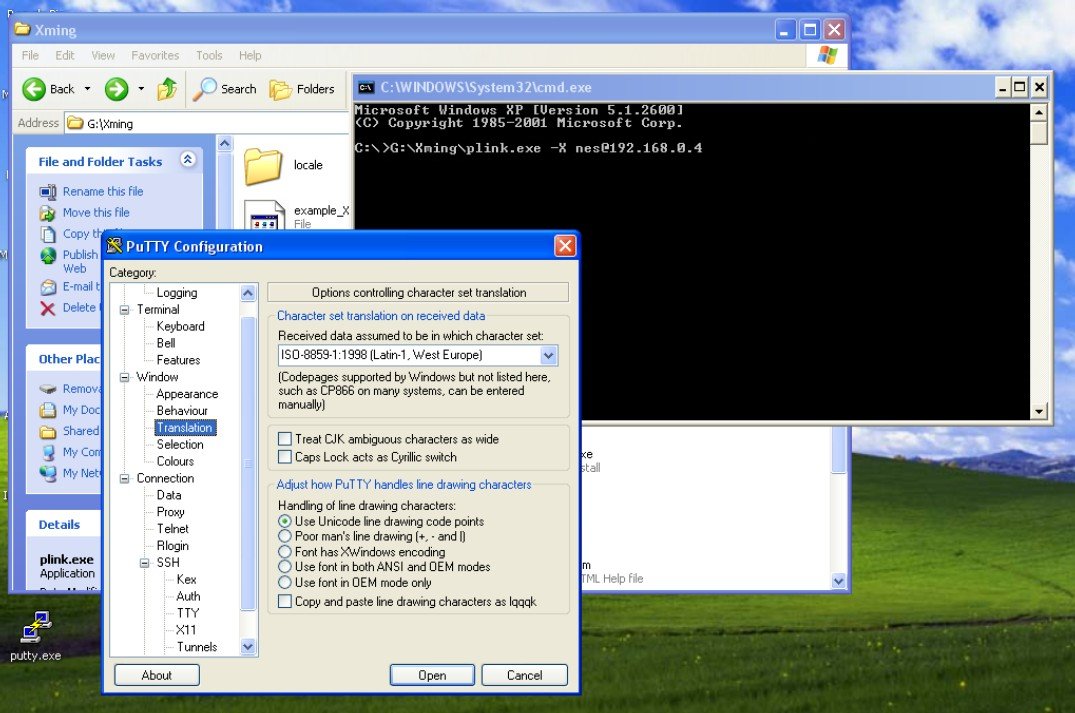
Click the “Run...” button in the Windows start menu and type “cmd.exe”. Click “OK” to run the Windows terminal. Go back to the Windows Explorer file manager and navigate back to your Xming folder. Find a program called “plink” and drag and drop it into the command line window.
Plink is an Xming application that suffices as a PuTTY replacement. PuTTY is a very sophisticated SSH client for Windows, but it has far more functionality than needed to simply run a few programs. Dragging and dropping the program into the terminal window enters the location of the plink program into the command line. Now complete the command as follows to open the program of your choice:
[plink location] -X [Ubuntu user name]@[IP address of Ubuntu machine]
Hit the enter key and you will be prompted for your Ubuntu password. Enter it and you will be dropped to a terminal from your Ubuntu machine. From here you can run all the commands you would in Ubuntu. To start more graphical applications, simply type their UNIX name as you did before and hit enter.
Troubleshooting SSH configuration
As I mentioned, the default OpenSSH configuration on Ubuntu should suffice for compatibility with Xming. If you are using a different distribution with other default settings or experience problems, read on for a few troubleshooting suggestions.
To configure OpenSSH, you need to open your favorite text editor as root and load the OpenSSH configuration file. If you still have that Ubuntu terminal window open, the following command will do this for you:
sudo gedit /etc/ssh/sshd_config
The file you just opened specifies all the configuration options for OpenSSH. Whatever distribution you use, a long default configuration file should be supplied. You will only need to look at a few specific lines in this file to make sure they are written as you want them.
Port
Quickly check what port your server is configured to accept connections on. This article has assumed you are using port 22, the standard port for SSH. The configuration file line should look like this:
Port [number]
If the number is not set to 22, you can change it to 22 or leave it as it is—and remember to specify the right port in the client software you use on Windows.
Password authentication
To follow my instructions above, you are expected to be proving your identity using a password. Although other methods exist, this is perhaps the simplest way to authenticate users and should provide plenty of security provided that you have a strong password. Make sure the following line is in your configuration file:
PasswordAuthentication yes
Remember that any line with a # (hash mark) in front of it is a comment and will not be considered as a setting. OpenSSH should default to using password authentication even if this line is preceded by a hash mark, but you can remove it just in case. Also note that if this line does not exist in your configuration file, it is safe to simply add it.
Allowed users
If your Ubuntu user is not permitted to be using SSH, it will certainly cause you problems when trying to log in. Make sure your user name is on the following line:
AllowUsers [my user]
X11 Forwarding
This is the line that is most likely to be causing you trouble, as it is often turned off by default. If it is not configured as shown below, you will be able to access your server with the command line but not start graphical applications.
X11Forwarding yes
The X11Forwarding line is what is most likely to cause trouble
Restart your server!
None of the configuration changes you have made will take effect until you restart your server as the root user. Do it by entering the following command:
sudo /etc/init.d/ssh restart
If you are using a distribution other than Ubuntu, something like “sshd” may appear in this command rather than “ssh”.
Use SSH responsibly
Now that you have learned to access your computer from across the room or across the country, remember that you can do as much damage to it from afar as up close. Don’t fool around in the command line unless you are sure you know what you are doing.
That said, if you have just learned to use SSH, now is a wonderful time to learn the greater power of the GNU/Linux command line. There are a bevy of resources on the internet and in bookstores to help you learn, including articles in Free Software Magazine.