A really sharp admin would probably be able to set up SNMP on my virtual server and keep it secure. I, however, have no confidence in my ability to do this, so I at first despaired of using Zenoss to support my web server (which would've been a shame).
Luckily for me, however, Zenoss can also collect information without SNMP, by using secure shell (SSH) access. This is essentially doing what I have been doing—logging in remotely and checking stuff out—but automatically.
I'm not sure why, but Zenoss isn't set up to do this completely using Posix tools (though it can collect some information that way). Instead, there is the distribution of "Zenoss Plugins". They are actually a bundle of Python utility programs that can be installed with Python setuptools, or via an RPM package. I don't honestly know the details, but I would imagine that Zenoss effectively calls these utilities via the shell connection, and reads the desire information from their output.
Once these are installed, though, the Zenoss server can collect information through a secure shell using the same username/password authentication system that I use when I log in: a much safer and easier solution for a reluctant and lazy network administrator like me.
Setting Up SSH/Command Monitoring for Web Server
Now, the web server is a different matter. As I said before, I don't want to compromise the security on my server by attempting to run SNMP on it. I'd likely mess it up, get hacked, and possibly not even notice until I got a snarky message from my hosting service and my account suspended.
So, I will rely on the SSH/Command modelling technique instead.
This is a little trickier, simply because you're working against the default assumptions of the interface. We start by going to the "Add Device" menu, just as shown in Figure 4. Now, however, we will change the "discovery protocol" to "none" and the "device class" to "Server/Cmd" (this indicates that we are using the SSH/Command method of modelling, and should set some defaults appropriately).
Since I am now referring to a computer outside of my LAN, I will need to give a fully-specified hostname (i.e. including the top-level domain) as the "device name". I do so, and then add the device.
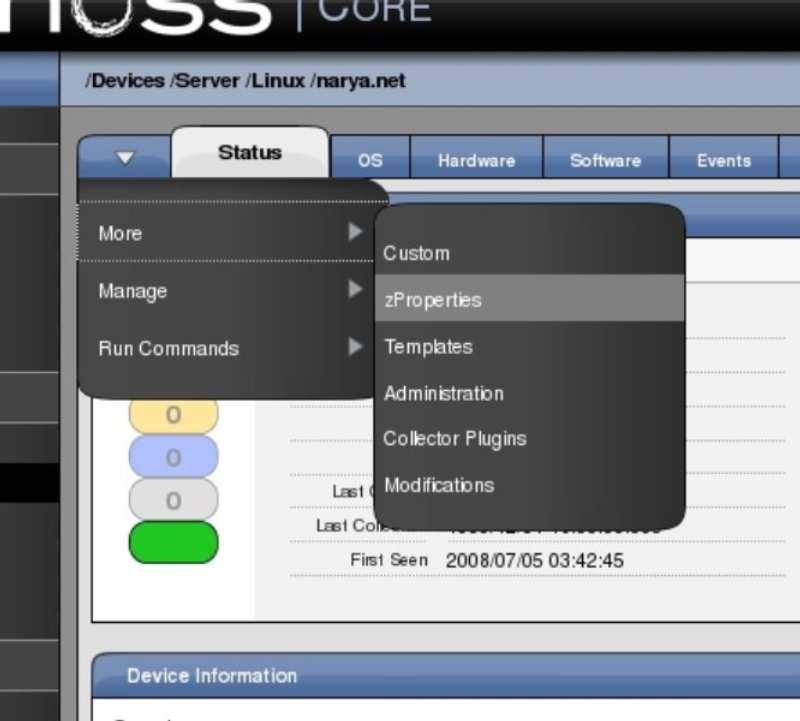
Now, we have to do some additional modifications via the "zProperties" tab, which is a little harder to find. If you look at the device page (as in Figure 7), you'll notice there is a tab with an arrow on it—this is a drop-down menu with additional, less-used options on it. One of them is zProperties, which will go to now (see Figure 10).
On the zProperties form, I now add a correct username and password. I was a little surprised that the password field echos normally as you type instead of showing asterisks like most password fields, but I was relieved to find that it returns to the obscured password format after the form is submitted (Figure 11).This is an ordinary SSH username and password, by the way, so it should be some username and password that you can log into your server with.

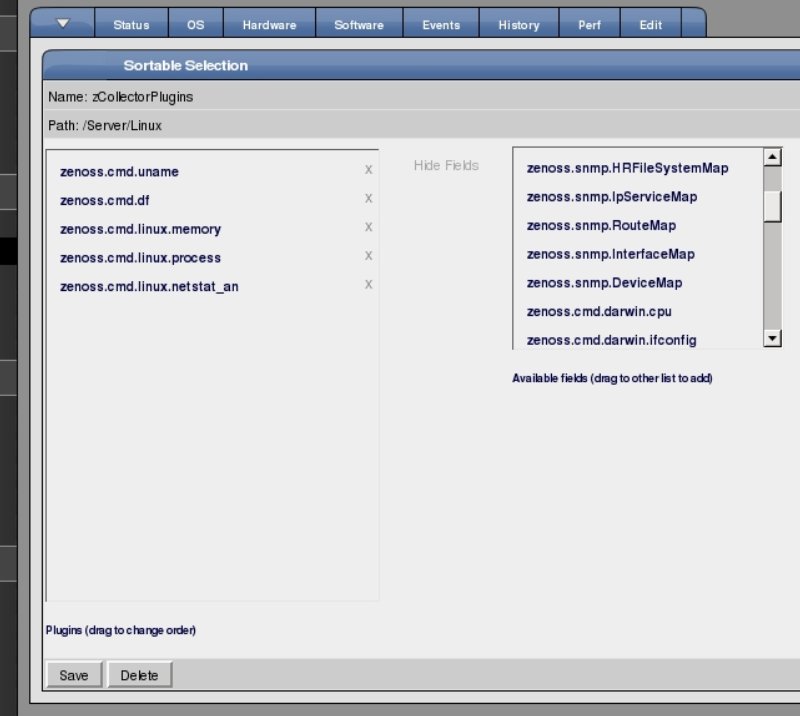
Also on this form is a link beside "zCollectorPlugins". Clicking on this will take you to an interface for selecting what sort of tools Zenoss will use to collect information about my web server, as seen in Figure 12. Initially, most of the plugins will be in the "zenoss/snmp" class, with the right hand menu collapsed. You first need to open this menu ("Add Fields") by clicking on the link to the right of the first list. The interface is fairly intuitive: clicking the little "X" makes the plugin go away, while items can be dragged from one list to the other with the mouse. You'll want to remove all of the "zenoss.snmp" plugins and add the ones beginning with "zenoss.cmd.linux" (and possibly a few with just "zenoss.cmd", like "zenoss.cmd.df" which apparently uses the Posix df command to collect disk usage information).
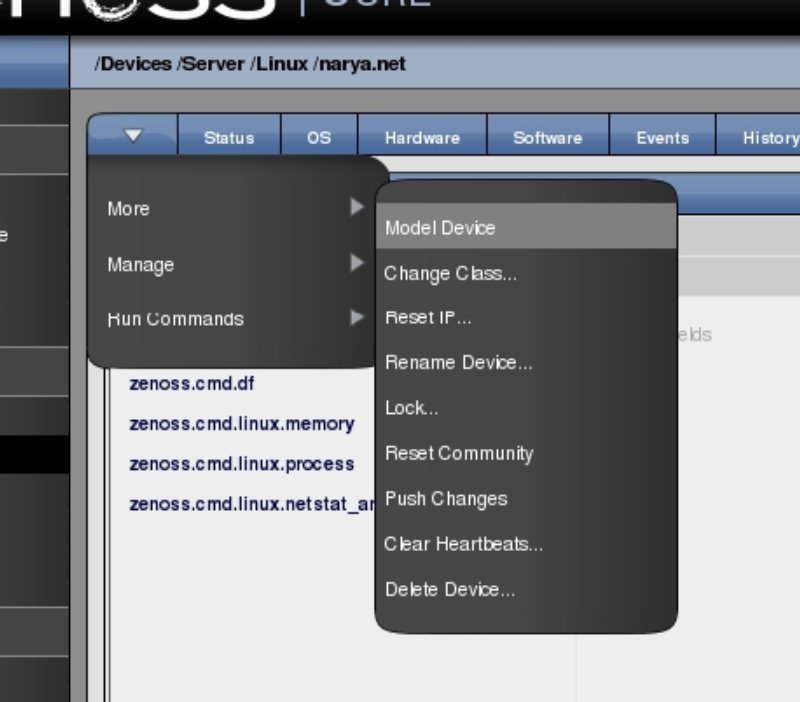
Once these are set, you will need to re-run the discovery process by going to "Model Device" (also on the arrow tab menu, see Figure 13).
Installing the Zenoss-Plugins package on the server
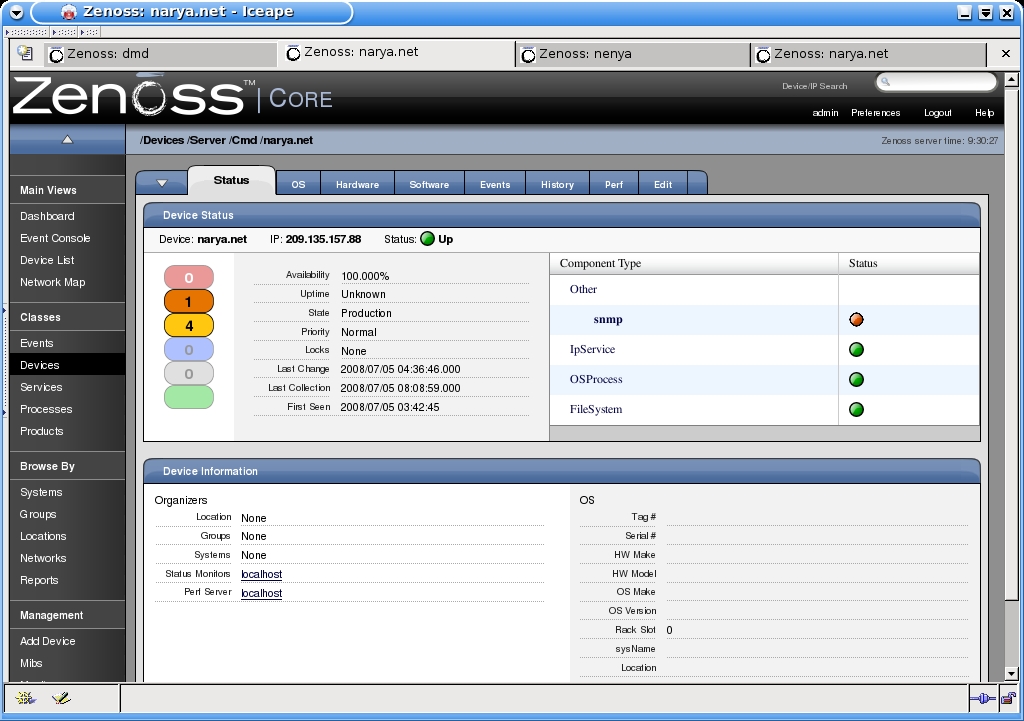
Immediately after re-modelling the computer, you will already get some data from it, as seen in Figure 14. However, a lot of information will be missing until the Zenoss-Plugin package is installed on the server machine, so now we'll do that.
There is a lot of conflicting documentation on the Zenoss plugins, but it appears that the best place to download the Zenoss-Plugins today is through Zenoss' Sourceforge page. The latest version as of this writing is "2.0.4" (version 1.0.0 is in the Python package repository, also known as the "Cheeseshop"—don't get that one!). Also, be aware of the naming inconsistencies: Zenoss Plugins is sometimes abbreviated as "zenplugins" and sometimes not.