All hail the lazy, for they will find the most efficient way to work a computer in general, and a word processor in particular. In this article, I’ll look at three lazy writer’s tricks that can relieve you of most of the drudgery involved in creating a fairly large document in OpenOffice.org Writer (henceforth, OOo Writer or simply Writer).
Make the computer do most of the work
A word processor such as Writer is “bloated” for a reason—it has features that save you a whole lot of work. Of course, masochists or uber-workaholics might hate these features, but the lazy user can’t imagine life without them.
These are the three things I’ll show you how to do:
- create a title page,
- create a table of contents,
- and change the page numbering styles
...the lazy way, of course.
Creating a title page
I’ll create a title page where the title lands in the middle of the page. This title page might also include author information—either just below the main title, or right at the bottom of the page.
Start with a blank page. If you’re adding a title page to an existing document, you’ll have to insert a new page before the first one. If you were workaholic or masochist, you would then type in the title, set its character and paragraph attributes, then hit the Enter key until it “looks” centered.
Masochists or uber-workaholics might hate these features, but the lazy user can’t imagine life without them
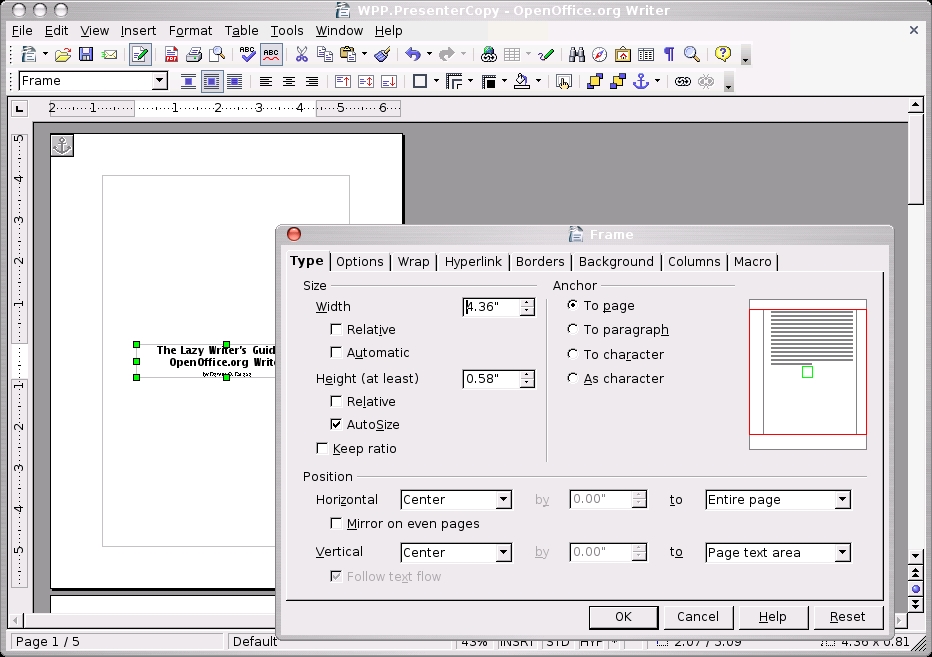
But you’re lazy and more sensible. So, you draw a text box anywhere on your blank page—its size doesn’t matter, because you can always adjust it later to fit your title. Use Insert→Frame to do this, type your title into the text frame, then resize as necessary.
Once you’re happy with your title, you’re ready to center it on the page. Right click on the text frame, select Frame, then choose Center from the Horizontal drop-down list, then Entire page from the to drop-down list. Also choose Center from the Vertical drop-down list, and Entire page from its corresponding to drop-down list (as shown in figure 1).
This should give you some idea of how to place an author frame at the bottom right of the page, which I will leave as an exercise for the reader.
Creating a table of contents
Once your document is long enough—say, upwards of 10 pages—it may be time for a table of contents to help your reader out. You can create a table of contents from an outline of your document, or from paragraph styles that you select—e.g., Heading or Heading 1. With Writer and, I suspect, MS Word and other modern word processors, you can create hyperlinks to your outline. So, when a reader clicks on a section heading in the table of contents, the program will move the cursor to that heading. For instance, if you click on the text “Planning the Migration” in figure 2 (take note that it’s got a blue underline), Writer will move to Chapter 5—which just “happens” to be titled “Planning the Migration”.
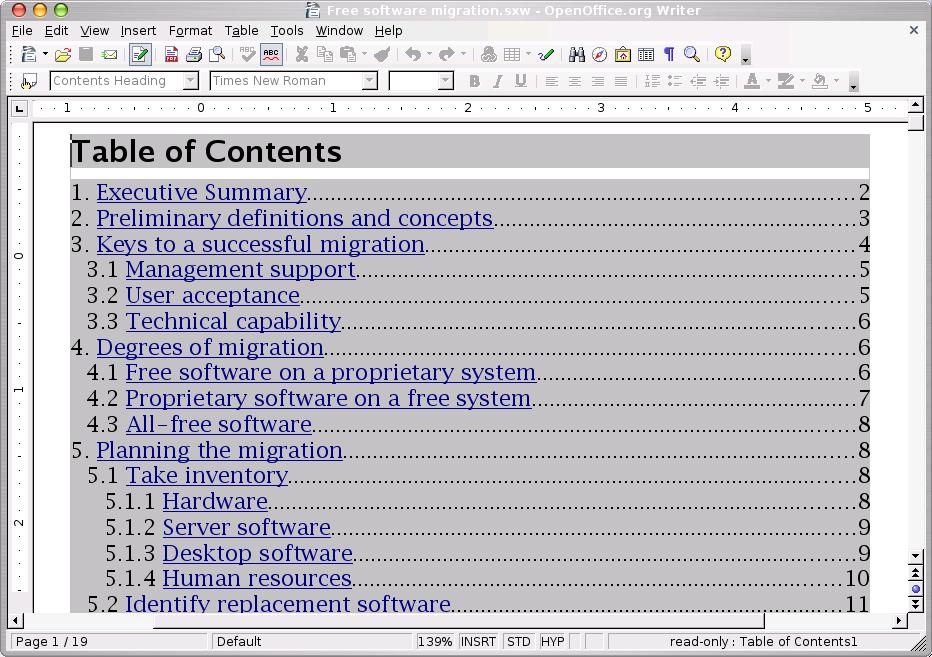
While I’m on the subject of outlines, you’ll notice that the sections and subsections are numbered. Again, I told Writer to put those numbers in. The cool thing about it is that if I insert a level-one outline item (say, between “Degrees of migration” and “Planning the migration”), the latter will be renumbered 5, and its sections 5.x and 5.x.y. Even cooler is that it’s not that hard to create a numbered outline—Tools→Outline Numbering did it. That’s just a bit of setup upfront to save tons of manual work.
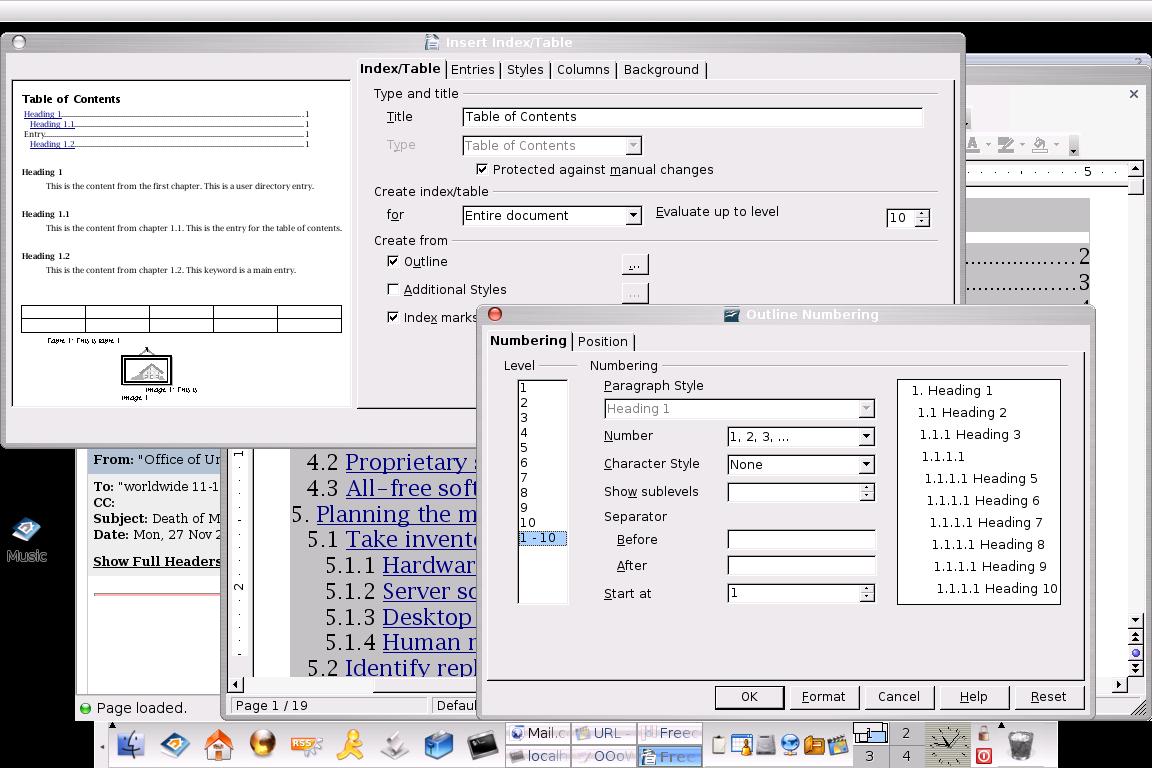
To create the table of contents, first move the mouse cursor to the start of the document, then Insert→Indexes and Tables, then click on Indexes and Tables. Below the Create from pane, check the Outline box, then click on the ellipsis (...). The Outline Numbering dialog box should come up (figure 3). Select 1-10 and click OK. If you want to create hyperlinks, click over to the Entries tab, click on the empty box to the left of the E and click on Hyperlink, then click on the empty box after the E and click on Hyperlink again. Click OK to create the table of contents.
The computer can do so much for us if we only let it
I should mention that Writer doesn’t automatically update the entries in the table of contents. If you inserted a new section between 5 and 6, for instance, or typed in enough text in section 5 to cause a page renumbering, the table of contents wouldn’t reflect the changes. Not to worry, Writer will do it for you, you just have to ask nicely—just right-click anywhere within the table of contents, then click Update index/table.
Changing page numbering style
A long document’s preface or foreword will come after the Table of Contents and its pages numbered with lower-case Roman numerals (i, ii, iii, ...). After that comes the main body of the document, numbered with Arabic numerals (1, 2, 3, ...). Here’s how to do it.
First, insert a new page. Use Insert→Manual Break (as shown in figure 4), then Page Break, and be sure to change the Style to Default. You can’t use the Ctrl-Enter keyboard shortcut because if you do, you’re stuck with the No Style option. Also set the page number to 1.
We should learn more about what our software can do for us so we can apply our hard work to things that really matter

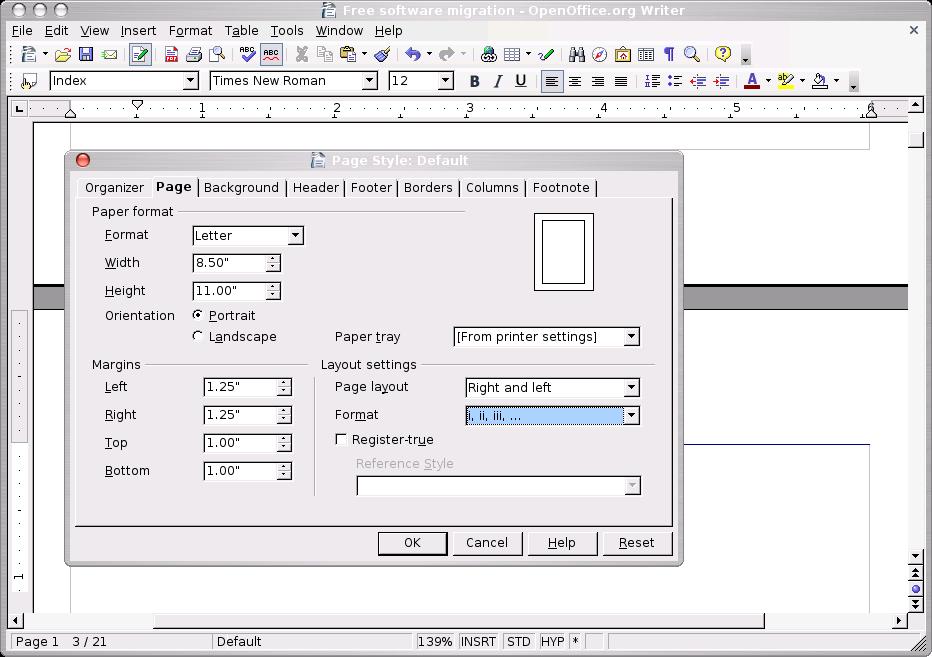
Next, format the page so that page numbers are lower-case Roman numerals: select the Page tab and select i, ii, ... from the Format drop-down list (as shown in figure 5). Also make sure that either your Header or Footer is on (depending on where your page numbers should be) by clicking on the appropriate tab and checking the relevant box. Type in your preface.
When you’re done with the preface, it’s time to go back to Arabic numeral page numbering: force another page break with Insert→Manual Break, then Page Break, and be sure to change the Style to Default, and the page number to 1. Also set the page number format to 1, 2, 3, ....
Conclusion
The computer can do so much for us if we only let it. I believe we work too hard at times, taking 20th or even 19th century habits into the 21st. We should learn more about what our software can do for us so we can apply our hard work to things that really matter.