As you notice from day to day use of Ubuntu, most tasks are easily accomplished. But what happens when you’re ready to expand your use of Ubuntu to include new applications, or connect to a home network and add new users? This brief guide shares the key steps necessary to create and manage other users, helps clarify some essential differences with other flavors, and provides tips regarding “root” user. Perhaps most importantly, these steps help empower the use of your Ubuntu system to become far more than just another desktop PC.
Understanding users in Ubuntu
The security and usefulness of your Ubuntu system depends a good deal on what you do to enable users and their privileges. Without falling into the minutia and the mundane, it is important to at least understand how users are handled in the Ubuntu GNU/Linux environment.
When you first install Ubuntu, you are required to create a user account. This initial user account, and for that matter all subsequent users, have their independent user files stored under the Home folder. But there is something unique about the first user account you create.
In my case, when installing Ubuntu, I created the user account: “mark”. Not only is mark my first Ubuntu user, but mark has automatically been given unique and powerful privileges that other users do not receive. My mark account can create users, change files and folders, and do a lot of administrative functions on Ubuntu that are normally performed by another important user account named “root”.
Therefore, in Ubuntu, you should understand the three key users:
- Initial user, in my case called mark, created when installing Ubuntu
- Root user, known as the administrator that usually has maximum privileges
- All other users, which I term basic users, are added following installation
Each of these three key users have their own folders, their own unique privileges, and most importantly their own role to play on your Ubuntu system. In the following sections, I will share how to enable and utilize each. Let’s begin with the basic user.
NOTE: I assume that you are logged in to your Ubuntu system as the initial user, thereby having the rights and privileges necessary to perform the tasks below.
Creating and managing basic users
Inevitably, once you setup Ubuntu in your home or office, others will come to you begging to get access. Some may want a chance to try out one of the multitude of cool applications that come preloaded with your system, while others desire to see GNU/Linux power! In other words, you need a good way to give them access without giving them the keys to the system.
Step 1. Accessing the users and groups tool
Creating basic user accounts is easily accomplished through the Users and Groups tool. From your main menu, choose System, then Administration. To start your tool select the Users and Groups menu item.
Notice the message that appears (figure 1).
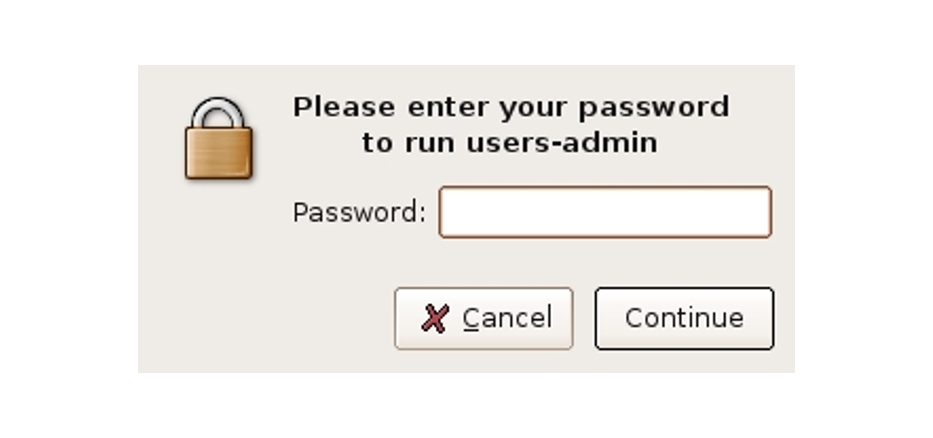
This is a very important message and what it infers is something unique about Ubuntu. In most GNU/Linux systems the privileged user is named root, and the password you type in would be that of root. However, in Ubuntu, the privileged user is the initial user account you created, and therefore you must type that user account password.
Once you type the password in, you will have access to all of the various administration tools. I provide more details regarding the reasons for this in the “Understanding the Superuser” section below.
Step 2. Adding a new user
You should now see the Users and Groups tool. Please choose the Add User button on the right.
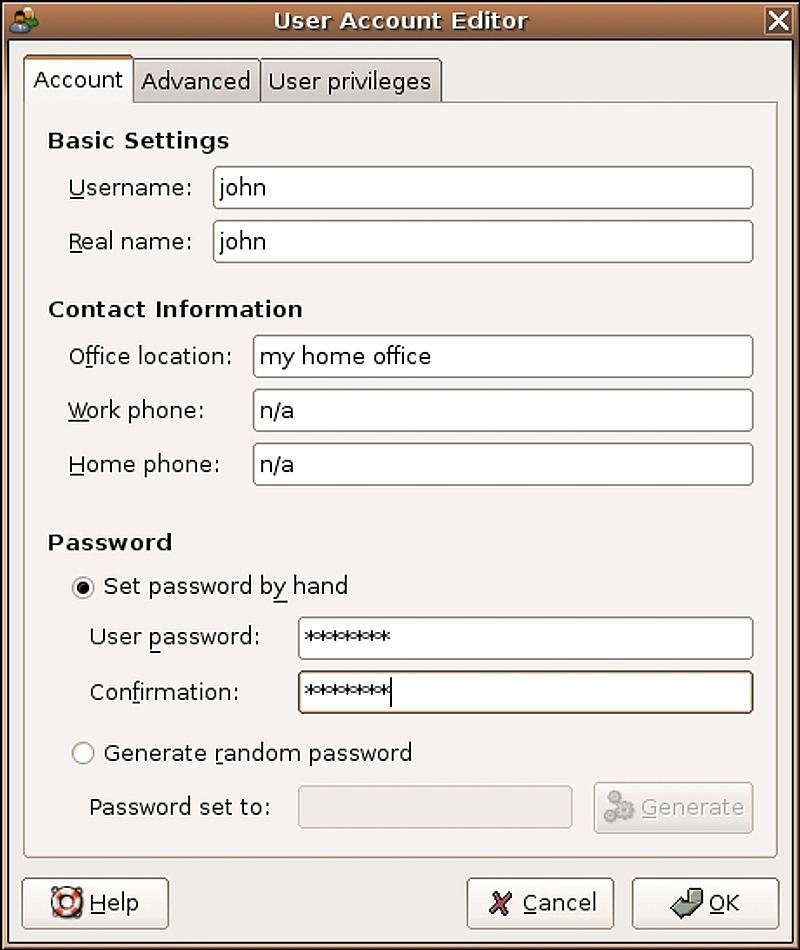
What you choose to include in the Account sections should be based on who you’re adding, and what you plan to do with your Ubuntu system. If you’re adding a basic user so someone else can also access your Ubuntu system, the defaults will be satisfactory.
For an example, I will add my son John as a basic user of my Ubuntu system so he can enjoy some of those cool GNU/Linux games. Below is the sample user information. Notice that I chose to manually set the password, since I prefer to give him something that is both secure and easily remembered (figure 2).
Before you press the OK button, please click on the “User privileges” tab at the top. This is an important step whenever you create a new user.
Under the “User privileges” tab, note the default access given to this basic user. You may prefer to change some of these, such as “Monitor system logs”, “and Connect to Internet”. Anything that is checked is allowed by this user. Also make sure that the “Executing system administration tasks” is NOT checked.
Once you are satisfied with the privileges granted to this new user, press the OK button.
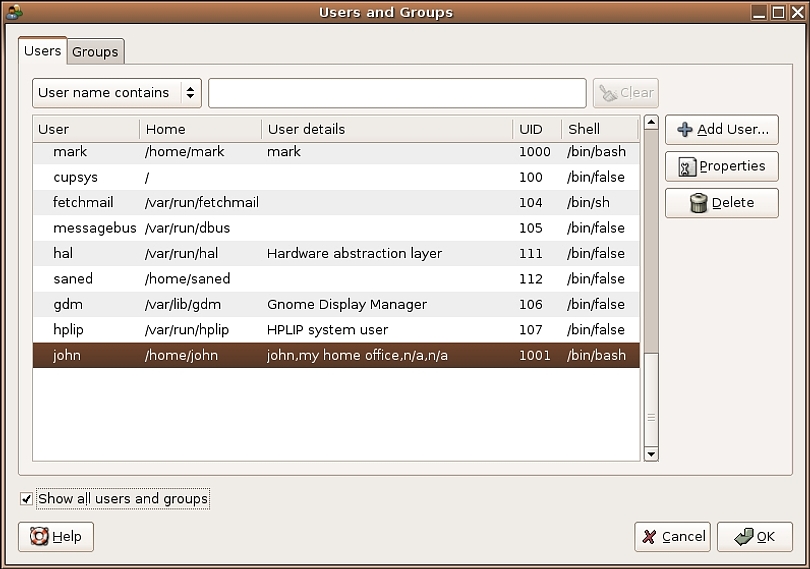
You should return to the main Users and Groups tool window. Now scroll down until you see the new user you just added. In my example, I added user: john (figure 3).
Once you are finished adding new basic users, it is very important to press the OK button again.
This will create the account and save the information you added. Ubuntu should also automatically create your new user’s folder under the Home directory.
Once finished, your new user will be able to login and enjoy the power of Ubuntu GNU/Linux!
If for some reason the login fails, please refer to the troubleshooting tips at the end of this article.
Step 3. Making future changes to users
Notice that if you wish, you can now go back and change the properties of this user by highlighting the user name and pressing the Properties button. Or, if this user is no longer needed or wanted in the future, you can highlight the name and press the Delete button.
If you ever decide to delete a basic user, realize that the folder and files from the user are not automatically removed, only the user’s login access is removed. This is greatly advantageous since it allows you to restore a previously deleted user without losing files.
In order to totally remove even the user’s folder, you will need to apply a super-user command. This is a step that is unlikely to be necessary for beginning Ubuntu, but that I explain briefly in the “Understanding the Superuser” section.
Creating and managing user groups
Although it is fine to simply leave a new user such as john in his or her own user group, you may prefer to also assign new users to another unique group. This affords not only an easier time in managing users rights, it also offers a means to share files, etc.
You do not have to assign new users to a group, the default is that they are assigned to their own personal group. But if you prefer to do so, below are the key steps.
Step 1. Start the users and groups tool
As mentioned above, access the tool from your main menu. However, instead of making changes or using the options on the “Users” tab, click on the “Groups” tab.
Scroll down until you see your new user. Notice that a group with the user’s name has also been added.
Step 2. Add a group
Now, press the Add Group button.
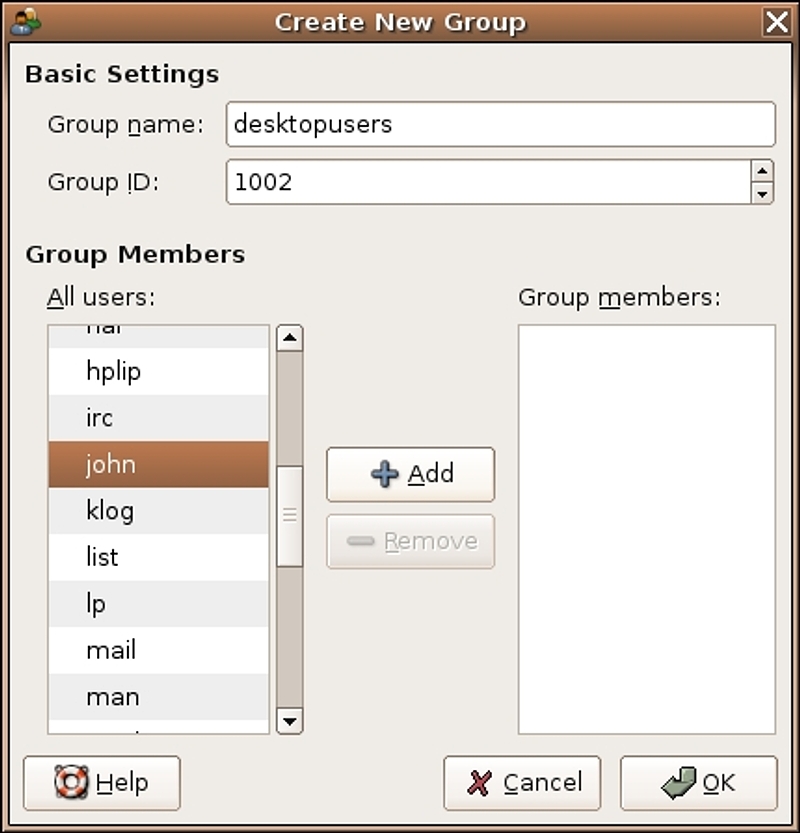
Notice in my example (see figure 4) that I’ve created a new group named “desktopusers”, and then highlighted my new user john. By pressing the Add button in the middle, I will add john to the group. You can add multiple users by holding down the Ctrl key and highlighting as many as you wish. Just be sure to press the Add button once you are done choosing.
Press OK when you are satisfied that all the users who belong in your new group were added (figure 5).
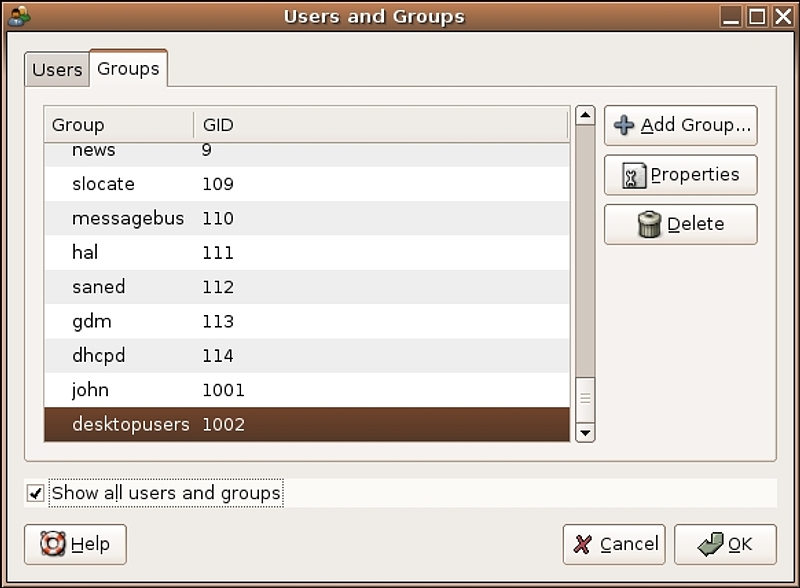
Notice that on your main “Users and Groups” window, the new group was added to the bottom of the list. Press OK again to save the changes.
That’s it! In the future, to change users in a particular group you can use the same steps above. But instead, highlight the group to change and press the Properties button.
What you enabled with this new group is that users, such as a working group of colleagues or friends, can now share files and manage folders that were given desktopuser group access.
Understanding the superuser
I briefly mentioned above that there are three key users in Ubuntu. This section will clarify why certain attributes exist, and what the key differences are between root and the initial user account.
Notice that in order to apply any of the steps above you needed to be logged in and use the initial Ubuntu account. The first account you create, during installation, is automatically assigned super-user do rights (also called sudo). With a super-user account, system administration and modification is possible.
The most powerful super-user account in GNU/Linux is root. However, you’ll notice that a root account is not automatically included in your Ubuntu installation details. The root does not, by default, come enabled for your use.
In situations where you must use superuser privileges, Ubuntu allows you to use the initial account combined with sudo. If for example you wanted to delete a basic user’s file folder from under Home, you would use the following commands from the command (terminal) prompt:
cd /home
sudo delete john
To run the sudo command you will be prompted for your initial user password. This prevents you from having to run as root to do basic system administration, while protecting your system from security weaknesses associated with fully enabling another account as superuser.
What about root?
Ubuntu hides the root account somewhat in order to discourage its use, unless absolutely necessary. Instead, almost all of the power and privileges needed for administration are assigned to your initial account.
But what about those instances where you plan to perform some major modifications or enhancements to your Ubuntu system? I must state that this is unlikely to ever be the case for a beginning user. But, if you are in a situation similar to myself, trying to add something as major as perhaps the LTSP to your Ubuntu (edubuntu.org already has some good options for new users who want this), then you may need to apply root.
Again, before you press ahead to enable your root account, I want to convey that you should not be using root for day-to-day administration. Nor should you follow the steps below if you are brand new to Ubuntu and read some document that says “you need to be logged in as root”. Instead, use sudo as described above to run such commands.
If you’ve gotten this far, you don’t need anymore disclaimers just a simple answer. To enable root in Ubuntu you use the same steps as mentioned in section 1. However, you highlight the root user account and then press the Properties button. From there you can set the root password by hand and press OK twice to save your changes. I just urge you not to become a habitual root account user and to stick with the initial account and sudo when possible.
Troubleshooting
It’s a rare thing for me to hear about problems creating and managing users. However, there are a few things to keep in mind.
Login failure
If you created a new user account based on the steps above and get a strange error, you may have a simple problem with the user’s properties. The errors you may see include: $Home/.dmrc not properly configured, or that the HOME/user does not exist and the default directory will be temporarily set to /root.
In both cases, the error was caused by the new user’s folder not being properly configured or created. You can resolve this easily enough, by simply deleting the user and starting the steps above again. But this time, also click on the Advanced tab, when adding user, and ensure that the line for Home directory reads: /home/$user
Obviously, this only applies during initial creation of a new user account.
Changes do not save
I’ve encountered this more often than you would imagine. It seems that people sometimes get confused when pressing the OK button during the steps above. You must not only press the OK button on the specific properties Window, but also press OK once again on the main Users and Groups window in order to save your changes.
Conclusion
You should now have all the key steps needed to create and manage multiple user accounts on Ubuntu. More importantly, you should also have a reasonable understanding of what to do if you need to run a command or perform an action that requires “root access”. By applying these steps, you can share the power and pleasure of your Ubuntu system with others, while retaining security and stability.